Customize product creation form
What's in this topic
This topic describes how developers can customize the product creation form used on the product creation and product edit pages in Admin.
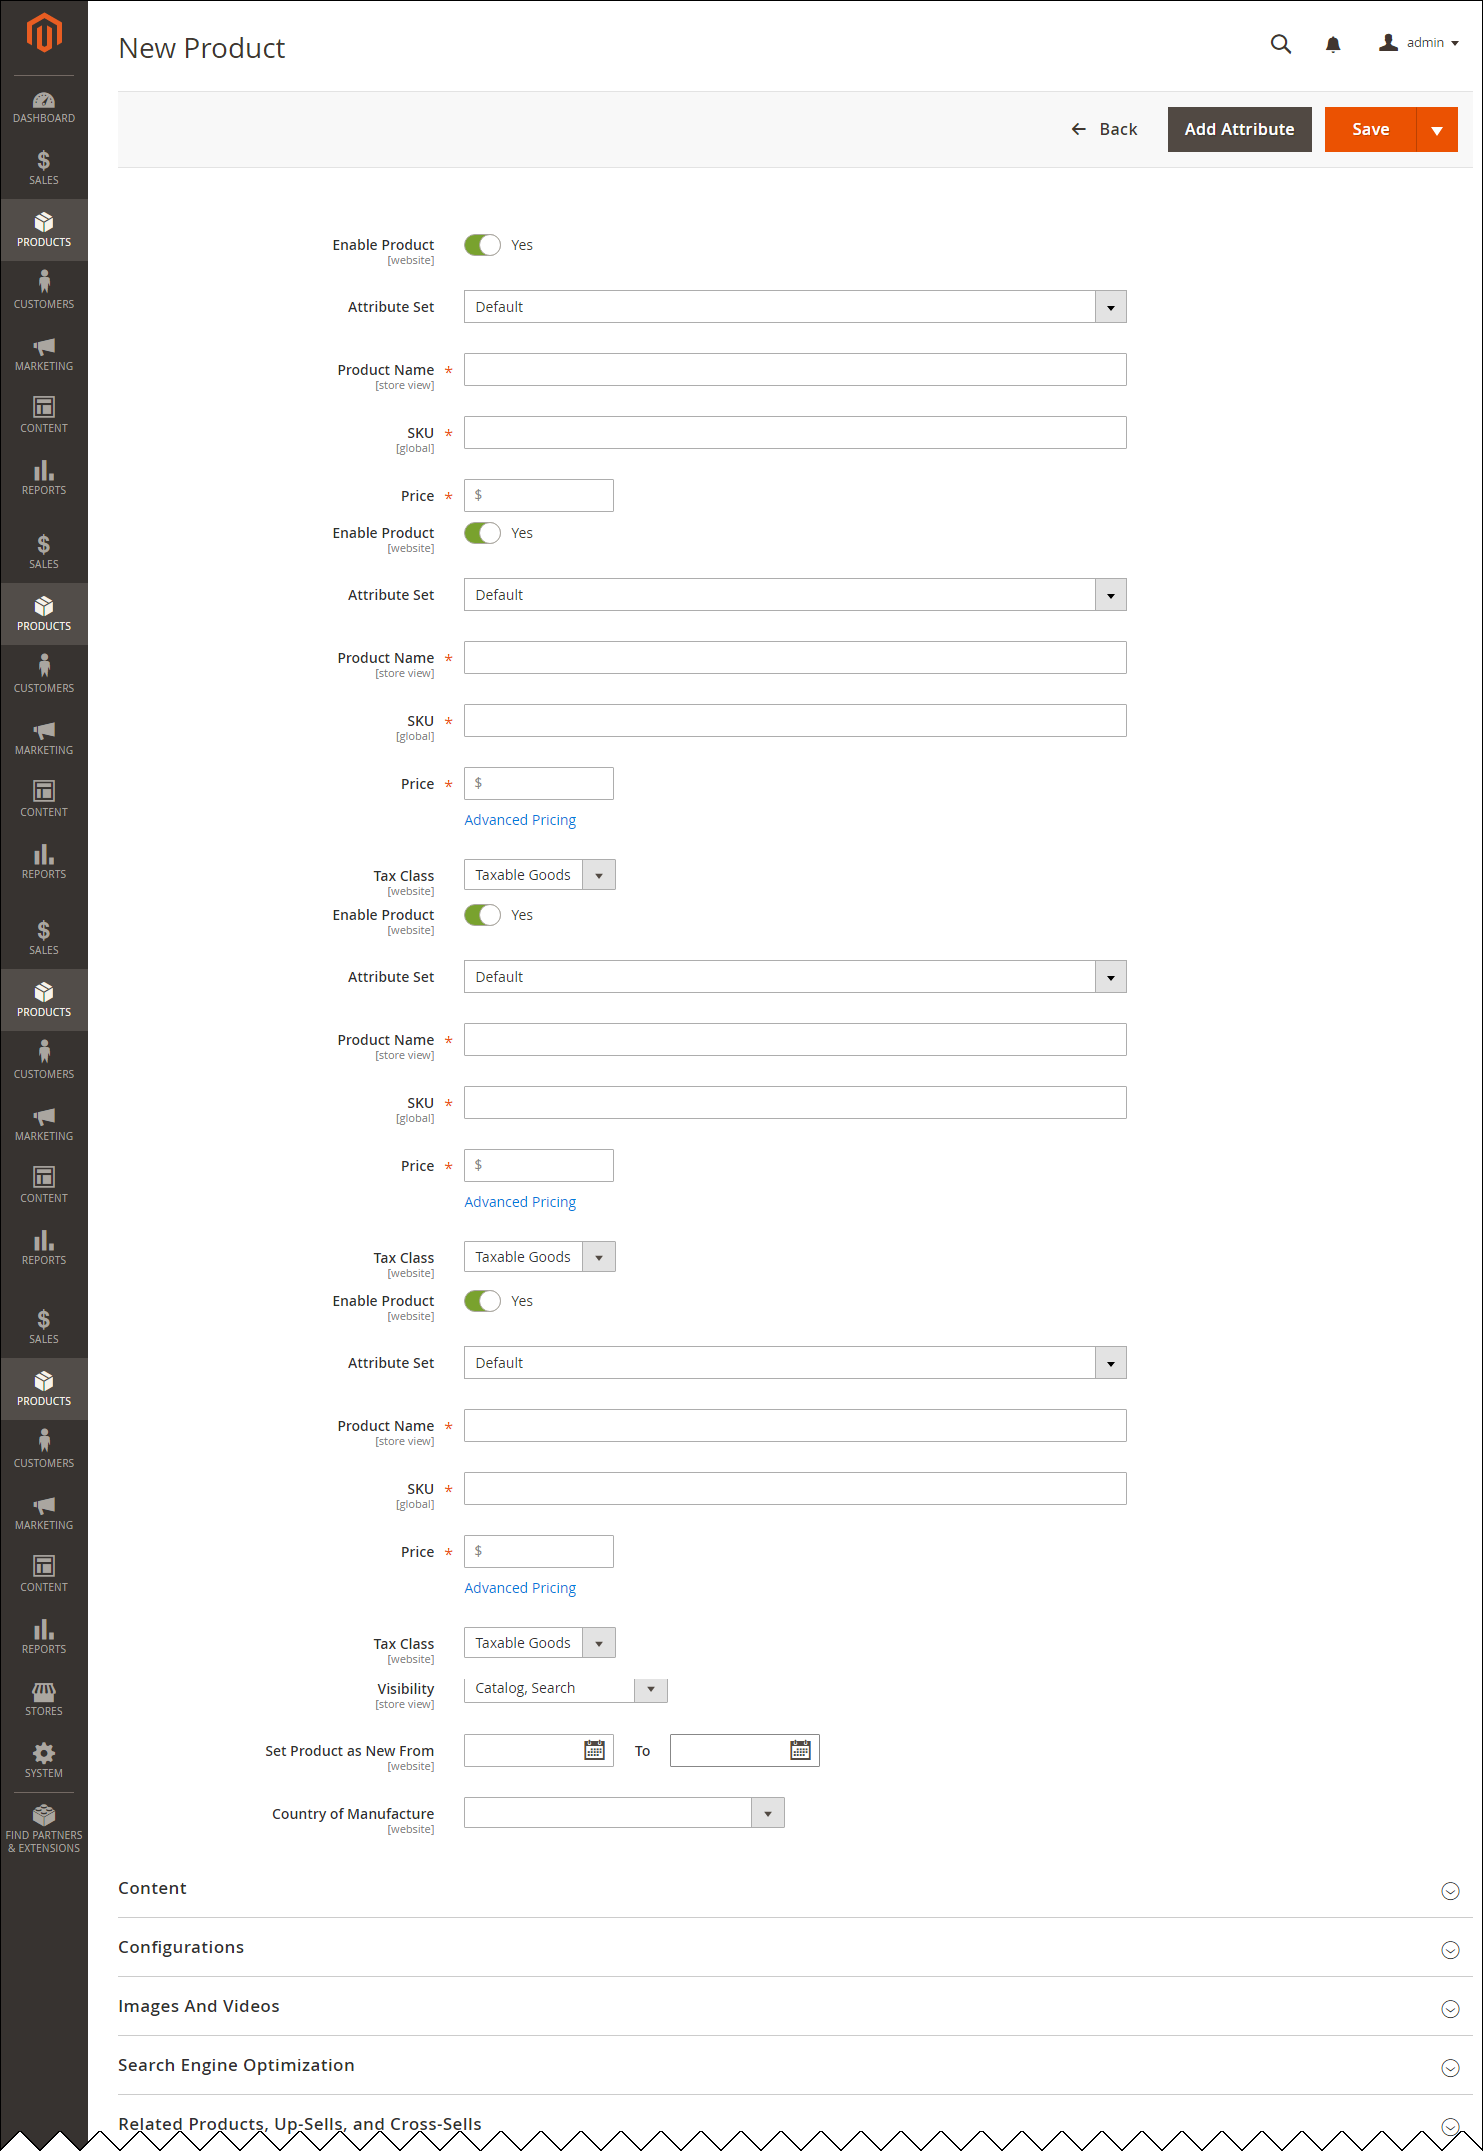
The following image is an illustration of the default view of the form on the New Product page:

Overview
In Magento version 2.1, the product creation form was completely refactored, and implemented using the form UI component.
Product attributes and attribute sets available in the form, can be customized and added under STORES > Attributes in the Admin. But you can also customize the form view and behavior in code. The following sections describe what files define the form and how they can be customized in your module.
Prerequisites
Set Magento to developer mode while you perform all customizations and debugging.
For the sake of compatibility, upgradability, and easy maintenance, do not edit the default Magento code. Instead, add your customizations in a separate module.
Customize the form configuration
Customizing the form config file (that is, declarative customization) is preferable for changes like introducing new fields, field sets and modals.
To customize the product creation form, take the following steps:
-
In your custom module, add an empty
product_form.xmlin the<your_module_dir>/view/adminhtml/ui_component/directory. -
In this file, add content similar to the following:
<form xmlns:xsi="http://www.w3.org/2001/XMLSchema-instance" xsi:noNamespaceSchemaLocation="urn:magento:module:Magento_Ui:etc/ui_configuration.xsd">

...

    <fieldset name="%fieldset_name%">
        <argument name="data" xsi:type="array">
            <item name="config" xsi:type="array">
                <item name="label" xsi:type="string" translate="true">%field set label as displayed in UI%</item>
                <item name="sortOrder" xsi:type="number">%order for displaying%</item>
            </item>
         </argument>
        <!--field sets can be nested -->
        <fieldset name="%nested_fieldset_name%">
            <argument name="data" xsi:type="array">
                <item name="config" xsi:type="array">
                    <item name="label" xsi:type="string" translate="true">%Nested fieldset Label as displayed in UI%</item>
                    <item name="collapsible" xsi:type="boolean">true</item>
                </item>
            </argument>
            <field name="%field_name%">
    			<argument name="data" xsi:type="array">
                    <item name="config" xsi:type="array">
                        <item name="%field_option1%" xsi:type="%option_type%">%value%</item>
                        <item name="%field_option2%" xsi:type="%option_type%">%value%</item>
....
                    </item>
                </argument>
            </field>
        </fieldset>
    </fieldset>
...
</form>
Adding new elements
By default, the new elements (fields, field sets, modals, grids) which you add in the form configuration file, are displayed on the form whatever product is created; that is, for all product types.
In the modifier class described further, you can set the conditions for displaying certain elements for certain product types.
Customizing existing fields and field sets
Your product_form.xml is merged with the same files from the other modules. So there is no need to copy their content, you only need to define changes. Even if you want to customize the existing entities, you only have to mention those options, the values of which are customized.
To customize an existing entity, declare only those options, the values of which are customized, do not copy its entire configuration.
To delete an existing field, or field set, in your product_form.xml use the following construction:
...
    <fieldset name="%fieldset_name%">
        <argument name="data" xsi:type="array">
            <item name="disabled" xsi:type="boolean">true</item>
        </argument>
    </fieldset>
...
For reference, view the product form configuration files of the Magento modules:
<Magento_Catalog_module_dir>/view/adminhtml/ui_component/product_form.xml<Magento_CatalogInventory_module_dir>/view/adminhtml/ui_component/product_form.xml<Magento_ConfigurableProduct_module_dir>view/adminhtml/ui_component/product_form.xml
Customize using a modifier class
Modifier classes should be used when static declaration is not applicable. For example, in cases when additional data should be loaded from database. Also, modifier is a place where you add validations to display only certain fields for certain product types.
In the run time, the form structure set in the modifier is merged with the configuration that comes from the product_form.xml configuration.
General implementation overview
The Magento\Catalog\Ui\DataProvider\Product\Form\ProductDataProvider data provider class is responsible for data and metadata preparation for the product form. The pool of modifiers Magento\Catalog\Ui\DataProvider\Product\Form\Modifier\Pool (virtual type) is injected to this data provider using the __construct() method. The pool’s preference is defined in di.xml.
To add your custom modifier, you need to do the following:
Add your modifier
In your custom module directory, add the modifier class that implements the Magento\UI\DataProvider\ModifierInterface interface or extends the Magento\Catalog\Ui\DataProvider\Product\Form\Modifier\AbstractModifierclass. In your modifier, the modifyData() and the modifyMeta() methods must be implemented.
In the modifier class, you can add UI elements using the same structure as in the XML configuration.
For example:
<?php

use Magento\Catalog\Ui\DataProvider\Product\Form\Modifier\AbstractModifier;

class Example extends AbstractModifier
{
    public function modifyMeta(array $meta)
    {
        $meta['test_fieldset_name'] = [
            'arguments' => [
                'data' => [
                    'config' => [
                        'label' => __('Label For Fieldset'),
                        'sortOrder' => 50,
                        'collapsible' => true
                    ]
                ]
            ],
            'children' => [
                'test_field_name' => [
                    'arguments' => [
                        'data' => [
                            'config' => [
                                'formElement' => 'select',
                                'componentType' => 'field',
                                'options' => [
                                    ['value' => 'test_value_1', 'label' => 'Test Value 1'],
                                    ['value' => 'test_value_2', 'label' => 'Test Value 2'],
                                    ['value' => 'test_value_3', 'label' => 'Test Value 3'],
                                ],
                                'visible' => 1,
                                'required' => 1,
                                'label' => __('Label For Element')
                            ]
                        ]
                    ]
                ]
            ]
        ];

 return $meta;
    }

    /**
     * {@inheritdoc}
     */
    public function modifyData(array $data)
    {
        return $data;
    }
}
You can create nested structures of elements by adding them to the children key of any element.
Add modifier to the pool
In <your_module_dir>/etc/adminhtml/di.xml define your modifier as a dependency for Magento\Catalog\Ui\DataProvider\Product\Form\Modifier\Pool.
Following is an example of such definition:
app/code/Magento/CatalogInventory/etc/adminhtml/di.xml:
     <virtualType name="Magento\Catalog\Ui\DataProvider\Product\Form\Modifier\Pool">
        <arguments>
            <argument name="modifiers" xsi:type="array">
                <item name="advancedInventory" xsi:type="array">
                    <item name="class" xsi:type="string">Magento\CatalogInventory\Ui\DataProvider\Product\Form\Modifier\AdvancedInventory</item>
                    <item name="sortOrder" xsi:type="number">20</item>
                </item>
            </argument>
        </arguments>
    </virtualType>
The sortOrder parameter defines the order of invocation for your modifyData() and modifyMeta() methods among other these methods of other modifiers in the pool. If a modifier is first in a pool, its modifyData() and modifyMeta() are invoked with empty arguments.
To access product model within your modifier, it’s recommended to use an instance of Magento\Catalog\Model\Locator\LocatorInterface.
For reference, view the modifier classes in the Magento modules, for example:
<Magento_Catalog_module_dir>/Ui/DataProvider/Product/Form/Modifier/AdvancedPricing.php<Magento_Catalog_module_dir>/Ui/DataProvider/Product/Form/Modifier/AttributeSet.php<Magento_Catalog_module_dir>/Ui/DataProvider/Product/Form/Modifier/Eav.php<Magento_ConfigurableProduct_module_dir>/Ui/DataProvider/Product/Form/Modifier/Data/AssociatedProducts.php
For reference about setting conditions for displaying certain elements for certain product types, view <Magento_Catalog_module_dir>/Ui/DataProvider/Product/Form/Modifier/Eav.php#L476.