Create a test in the Functional Testing Framework
To demonstrate the usage of test components from previous sections in the test creation process, we will create a new functional injectable test step-by-step. Before creating automated test, try to pass it manually.
To make the documentation more consistent, we created a completely new test specially for this tutorial. We used the concrete Magento commit functionality for this test. You can install one and try to follow this guide.
Test description
Create a synonym group (synonyms are a way to expand the scope of eligible matching products) with:
- Scope:
- All Websites
- All Store Views
- Default Store View
- Synonyms: shoes, foot wear, men shoes, women shoes.
Manual testing scenario
Variation 1:
- Log in to Admin.
- Browse to “Marketing” > “SEO & Search” > “Search Synonyms”.
- Click the “New Synonyms Group” button.
- Enter data in the “Synonyms” field.
- Click the “Save Synonym Group” button.
- Verify the synonym group saved successfully
Variation 2:
- Log in to Admin.
- Browse to “Marketing” > “SEO & Search” > “Search Synonyms”.
- Click the “New Synonyms Group” button.
- Select “All Store Views” in a “Scope” field.
- Enter data in the “Synonyms” field.
- Click the “Save Synonym Group” button.
- Verify the synonym group saved successfully
Variation 3:
- Log in to Admin.
- Browse to “Marketing” > “SEO & Search” > “Search Synonyms”.
- Click the “New Synonyms Group” button.
- Select “Default Store View” in a “Scope” field.
- Enter data in the “Synonyms” field.
- Click the “Save Synonym Group” button.
- Verify the synonym group saved successfully
Automated testing scenario
- Log in to Admin.
- Open the Search Synonym page.
- Click the “New Synonym Group” button.
- Enter data according to a data set. For each variation, the synonyms must have unique identifiers.
- Click the “Save Synonym Group” button.
- Verify the synonym group saved successfully
Test creation
Step 1. Check the FTF configuration and environment
-
Adjust configuration. Learn how to adjust a configuration.
-
Prepare Magento application. Learn how to prepare Magento application.
-
Prepare environment for test run. Learn how to prepare environment for test run.
Step 2. Create the testing object - a fixture
This step is applicable if a fixture doesn’t exist in a module.
Use a generateFixtureXml.php to create a new fixture.
Enter in your terminal:
cd <magento2_root_dir>/dev/tests/functional/utils
php -f generateFixtureXml.php -- --name synonym --entity_type search_synonyms --collection Magento\\Search\\Model\\ResourceModel\\Query\\Collection
See the following explanations.
| Parameter | Value | Explanation |
|---|---|---|
--name |
synonym |
A name of the fixture. It can have any name. synonym seems to be logical. |
--entity_type |
search_synonyms |
Database table name where entity data is stored. You can track database input when you perform a manual testing. A new record will be created in a table that you need. |
--collection |
Magento\\Search\\Model\\ResourceModel\\Query\\Collection |
Collection to generate data sets. Synonyms are the entities of a Magento_Search module. A collection can always be found in model resources. |
All slashes must be escaped with \\.
As a result of previous commands, a brand new fixture can be found in the <magento2_root_dir>/dev/tests/functional/tests/app/Magento/Search/Test/Fixture directory.
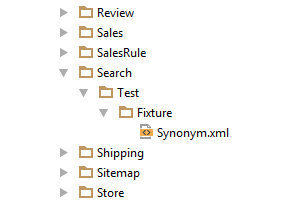
The following is a code of the new Synonym fixture.
<?xml version="1.0" encoding="utf-8"?>
<config xmlns:xsi="http://www.w3.org/2001/XMLSchema-instance" xsi:noNamespaceSchemaLocation="../../../../../../vendor/magento/mtf/etc/fixture.xsd">
<fixture name="synonym"
module="Magento_Search"
entity_type="search_synonyms"
type="flat"
collection="Magento\Search\Model\ResourceModel\Query\Collection"
repository_class="Magento\Search\Test\Repository\Synonym"
handler_interface="Magento\Search\Test\Handler\Synonym\SynonymInterface"
class="Magento\Search\Test\Fixture\Synonym">
<field name="group_id" is_required="1 "/>
<field name="synonyms" is_required="0" />
<field name="store_id" is_required="0" />
<field name="website_id" is_required="0" />
</fixture>
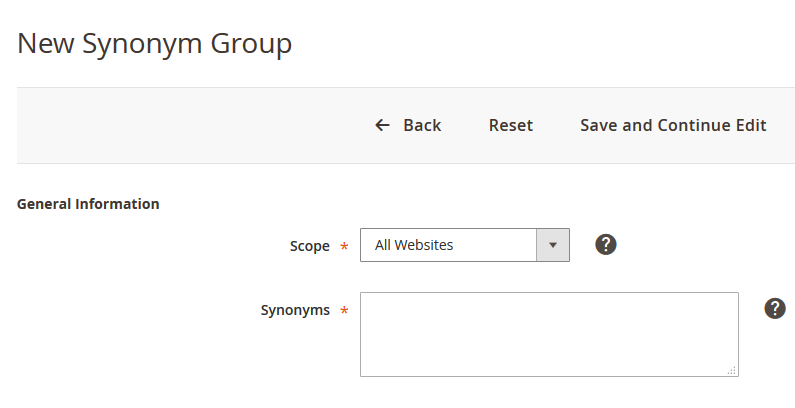
</config>If we open a New Synonym Group page in a browser
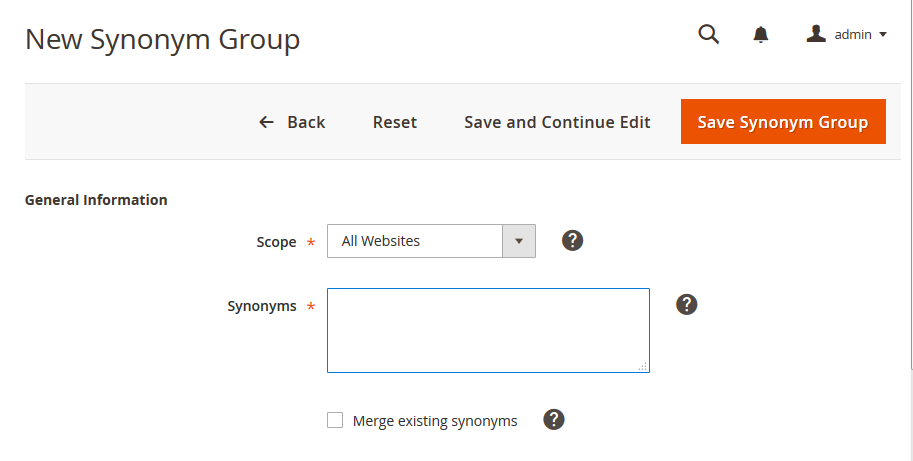
we see that store_id and website_id are combined in the “Scope” fields. To set store_id and website_id, we have to perform some more logic than just entering the data. That’s why we should use a data source.
The same field is present in Magento_Widget module. It means that data source has been already written and we can reuse it.
Let’s check the functional tests for the Magento_Widget module.
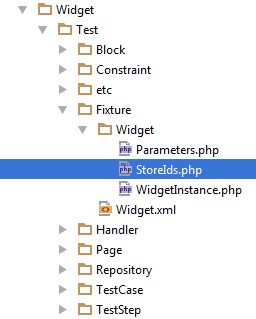
It contains a StoreIds.php data source, that is similar to what we need. It has the following code:
<?php
/**
 * Copyright © 2015 Magento. All rights reserved.
 * See COPYING.txt for license details.
 */

namespace Magento\Widget\Test\Fixture\Widget;

use Magento\Store\Test\Fixture\Store;
use Magento\Mtf\Fixture\FixtureFactory;
use Magento\Mtf\Fixture\DataSource;

/**
 * Prepare Store.
 */
class StoreIds extends DataSource
{
    /**
     * Return stores.
     *
     * @var Store
     */
    protected $stores = [];

    /**
     * @constructor
     * @param FixtureFactory $fixtureFactory
     * @param array $params
     * @param array $data
     */
    public function __construct(FixtureFactory $fixtureFactory, array $params, array $data = [])
    {
        $this->params = $params;
        if (isset($data['dataset'])) {
            $dataset = explode(',', $data['dataset']);
            foreach ($dataset as $store) {
                /** @var Store $store */
                $store = $fixtureFactory->createByCode('store', ['dataset' => $store]);
                if (!$store->hasData('store_id')) {
                    $store->persist();
                }
                $this->stores[] = $store;
                $this->data[] = $store->getName();
            }
        } else {
            $this->data[] = null;
        }
    }

    /**
     * Return stores.
     *
     * @return Store
     */
    public function getStores()
    {
        return $this->stores;
    }
}
The difference is that it is designed for multiple stores, but we don’t need that. Adding some changes we can get our data source.
<?php

namespace Magento\Search\Test\Fixture\Synonym;

use Magento\Store\Test\Fixture\Store;
use Magento\Mtf\Fixture\FixtureFactory;
use Magento\Mtf\Fixture\DataSource;

/**
 * Prepare Store.
 */
class ScopeId extends DataSource
{
    /**
     * Return store.
     *
     * @var Store
     */
    protected $store = null;

    /**
     * @constructor
     * @param FixtureFactory $fixtureFactory
     * @param array $params
     * @param array $data
     */
    public function __construct(FixtureFactory $fixtureFactory, array $params, array $data = [])
    {
        $this->params = $params;
        if (isset($data['dataset'])) {
            $store = $fixtureFactory->createByCode('store', ['dataset' => $data['dataset']]);
            if (!$store->hasData('store_id')) {
                $store->persist();
            }
            $this->store = $store;
            $this->data = $store->getName();
        } else {
            $this->data = $data;
        }
    }

    /**
     * Return store.
     *
     * @return Store
     */
    public function getStore()
    {
        return $this->store;
    }
}
This data source:
- Checks if a field has a
datasetkey in a value that comes from a variation. If it doesn’t, then field is assigned a value from the variation. - If it does, then a new Store fixture is created with a
datasetfrom a Store repository (<magento2_root_dir>/dev/tests/functional/tests/app/Magento/Store/Test/Repository/Store.xml). - Checks if the
store_idfield exists in the Store fixture. If it doesn’t, a new Store in Magento is created. - Returns a Store
namevalue.
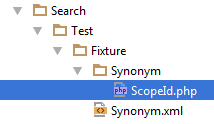
We should save it as <magento2_root_dir>/dev/tests/functional/tests/app/Magento/Search/Test/Fixture/Synonym/ScopeId.php.
Now we should change the fixture. Instead of store_id and website_id, we must use scope_id with the Magento\Search\Test\Fixture\Synonym\ScopeId data source class.
... ... ...
<field name="group_id" is_required="0" />
<field name="synonyms" is_required="0" />
<field name="scope_id" is_required="0" source="Magento\Search\Test\Fixture\Synonym\ScopeId" />
... ... ...
Then, we must regenerate the fixture to apply changes:
php <magento2_root_dir>/dev/tests/functional/utils/generate.php
A new PHP class Synonym.php is generated in <magento2_root_dir>/dev/tests/functional/generated/Magento/Search/Test/Fixture.
<?php
/**
 * Copyright © 2015 Magento. All rights reserved.
 * See COPYING.txt for license details.
 */

namespace Magento\Search\Test\Fixture;

/**
 * Class Synonym
 */
class Synonym extends \Magento\Mtf\Fixture\InjectableFixture
{
    /**
     * @var string
     */
    protected $repositoryClass = 'Magento\Search\Test\Repository\Synonym';

    /**
     * @var string
     */
    protected $handlerInterface = 'Magento\Search\Test\Handler\Synonym\SynonymInterface';


    /**
     * @var array
     */
    protected $group_id = [
        'is_required' => '0',
    ];

    /**
     * @var array
     */
    protected $synonyms = [
        'is_required' => '0',
    ];

    /**
     * @var array
     */
    protected $scope_id = [
        'is_required' => '0',
        'source' => 'Magento\Search\Test\Fixture\Synonym\ScopeId',
    ];

    /**
     * @return mixed
     */
    public function getGroupId()
    {
        return $this->getData('group_id');
    }

    /**
     * @return mixed
     */
    public function getSynonyms()
    {
        return $this->getData('synonyms');
    }

    /**
     * @return mixed
     */
    public function getScopeId()
    {
        return $this->getData('scope_id');
    }
}
Step 3. Create the initial test case
Now we can create a test case.
From the test case topic we know about the structure, location and name of the test case.
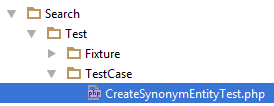
In this example it is named CreateSynonymEntityTest.php and stored in <magento2_root_dir>/dev/tests/functional/tests/app/Magento/Search/Test/TestCase.
As a result of manual testing we know that we must work with a Search Synonym Index page and a New Synonym Group page during the test flow. We can code the initialization of these pages in the test using an __inject() method of the Magento\Mtf\TestCase\Injectable class. The pages will be created in Step 5. Also, we will use the fixture from the Step 2.
<?php

namespace Magento\Search\Test\TestCase;

use Magento\Mtf\TestCase\Injectable;
use Magento\Search\Test\Fixture\Synonym;

/**
 * Steps:
 * 1. Log in to Admin.
 * 2. Open the Search Synonym page.
 * 3. Click the "New Synonym Group" button.
 * 4. Enter data according to a data set. For each variation, the synonyms must have unique identifiers.
 * 5. Click the "Save Synonym Group" button.
 * 6. Verify the synonym group saved successfully.
 */
class CreateSynonymEntityTest extends Injectable
{
    /**
     * Search Synonyms Index page.
     *
     * @var SynonymsIndex
     */
    private $synonymsIndex;

    /**
     * New Synonym Group page.
     *
     * @var SynonymsNew
     */
    private $synonymsNew;

    /**
     * Inject synonym pages.
     *
     * @param SynonymsIndex $synonymsIndex
     * @param SynonymsNew $synonymsNew
     * @return void
     */
    public function __inject(
        SynonymsIndex $synonymsIndex,
        SynonymsNew $synonymsNew
    ) {
        $this->synonymsIndex = $synonymsIndex;
        $this->synonymsNew = $synonymsNew;
    }

    /**
     * Create Synonym group test.
     *
     * @param Synonym $synonym
     * @return void
     */
    public function test(Synonym $synonym)
    {
        // Steps
    }
}
Step 4. Create the data set
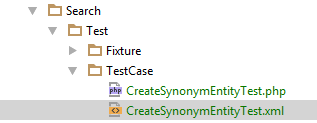
Now we can add a data set with variations that cover cases in the test description: <magento2_root_dir>/dev/tests/functional/tests/app/Magento/Search/Test/TestCase/CreateSynonymEntityTest.xml
The following code contains a data set, but doesn’t have data yet:
<?xml version="1.0" encoding="utf-8"?>
<config xmlns:xsi="http://www.w3.org/2001/XMLSchema-instance" xsi:noNamespaceSchemaLocation="../../../../../../vendor/magento/mtf/etc/variations.xsd">
    <testCase name="Magento\Search\Test\TestCase\CreateSynonymEntityTest" summary="Create Synonyms" ticketId="MAGETWO-123">
        <variation name="CreateCategoryEntityTestVariation1_all_websites_all_store_views" summary="Create synonym for all websites and all store views">
        enter data and constraints for vaiation 1
        </variation>
        <variation name="CreateCategoryEntityTestVariation2_main_website_all_store_views" summary="Create synonyms for main website and all store views">
        enter data and constraints for vaiation 2
        </variation>
        <variation name="CreateCategoryEntityTestVariation3_main_website_default_store_view" summary="Create synonyms for main website and default store views">
        enter data and constraints for variation 3
        </variation>
    </testCase>
</config>
According to a New Synonym Group form we need to enter data in the synonyms and scope_id fields.
synonymsfield. We need to set data to a fixture field. The name of the field should be<name of a fixture>/data/<name of the field>. It isname = "synonym/data/synonyms". To make data unique in each variation, we can use the%isolation%placeholder.scope_idfield. We need to set data to a fixture field from a repository. The name of the field should be<name of a fixture>/data/<name of the field>/dataset. It isname="synonym/data/scope_id/dataset". As you remember from Step 2, we use the data source to process this field. The data source loads the Store fixture with the Store repository, and returns the name of the field we need. In adatasetvalue, we should specify a name of the Store repositorydataset namefrom<magento2_root_dir>/dev/tests/functional/tests/app/Magento/Store/Test/Repository/Store.xml.
| Variation # | synonyms |
scope_id |
|---|---|---|
| variation 1 | shoes %isolation%, foot wear %isolation%, men shoes %isolation%, women shoes %isolation% |
In this variation we won’t use this field to cover All Website case, because it is selected automatically when the New Synonym Group page is opened |
| variation 2 | shoes %isolation%, foot wear %isolation%, men shoes %isolation%, women shoes %isolation% |
all_store_views |
| variation 3 | shoes %isolation%, foot wear %isolation%, men shoes %isolation%, women shoes %isolation% |
default_store_view |
Let’s see the data set with data.
<?xml version="1.0" encoding="utf-8"?>
<config xmlns:xsi="http://www.w3.org/2001/XMLSchema-instance" xsi:noNamespaceSchemaLocation="../../../../../../vendor/magento/mtf/etc/variations.xsd">
    <testCase name="Magento\Search\Test\TestCase\CreateSynonymEntityTest" summary="Create Synonyms" ticketId="MAGETWO-23022016">
        <variation name="CreateCategoryEntityTestVariation1_all_websites_all_store_views" summary="Create synonym for all websites and all store views">
            <data name="synonym/data/synonyms" xsi:type="string">shoes %isolation%, foot wear %isolation%, men shoes %isolation%, women shoes %isolation%</data>
        </variation>
        <variation name="CreateCategoryEntityTestVariation2_main_website_all_store_views" summary="Create synonyms for main website and all store views">
            <data name="synonym/data/synonyms" xsi:type="string">shoes %isolation%, foot wear %isolation%, men shoes %isolation%, women shoes %isolation%</data>
            <data name="synonym/data/scope_id/dataset" xsi:type="string">all_store_views</data>
        </variation>
        <variation name="CreateCategoryEntityTestVariation3_main_website_default_store_view" summary="Create synonyms for main website and default store views">
            <data name="synonym/data/synonyms" xsi:type="string">shoes %isolation%, foot wear %isolation%, men shoes %isolation%, women shoes %isolation%</data>
            <data name="synonym/data/scope_id/dataset" xsi:type="string">default_store_view</data>
        </variation>
    </testCase>
</config>
A bit later we will add assertions to complete our data set.
Step 5. Create the pages
In Step 3, we added two pages to the test case class. Because both pages are in the Admin area, we should create them in the <magento2_root_dir>/dev/tests/functional/tests/app/Magento/Search/Test/Page/Adminhtml directory.
SynonymsIndex.xml
<?xml version="1.0" encoding="utf-8"?>
<config xmlns:xsi="http://www.w3.org/2001/XMLSchema-instance" xsi:noNamespaceSchemaLocation="../../../../../../../vendor/magento/mtf/etc/pages.xsd">
    <page name="SynonymsIndex" area="Adminhtml" mca="search/synonyms/index" module="Magento_Search">
        <block ... />
    </page>
</config>
SynonymsNew.xml
<?xml version="1.0" encoding="utf-8"?>

<config xmlns:xsi="http://www.w3.org/2001/XMLSchema-instance" xsi:noNamespaceSchemaLocation="../../../../../../../vendor/magento/mtf/etc/pages.xsd">
    <page name="SynonymsNew" area="Adminhtml" mca="search/synonyms/new" module="Magento_Search">
        <block ... />
    </page>
</config>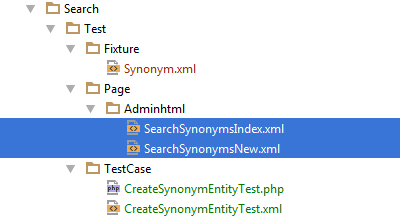
To generate PHP classes for these pages enter and run in your terminal
php <magento2_root_dir>/dev/tests/functional/utils/generate.php
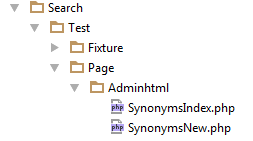
In the next step we will create blocks that implements logic in these pages.
Step 6. Create the blocks
Let’s see in the test description what actions must be performed:
- Click the “New Synonym Group” button.
- Enter data according to a data set.
- Click the “Save Synonym Group” button.
How to code ‘Click the “New Synonym Group” button’
Fortunately, you already have a block that contains a method to add a new entity in a grid: \Magento\Backend\Test\Block\GridPageActions.
/**
 * Click the "Add New" button
 *
 * @return void
 */
public function addNew()
{
    $this->_rootElement->find($this->addNewButton)->click();
}
In HTML page, to locate the UI block that contains a button, we will use a .page-main-actions locator. Learn how to define a locator.
The SynonymsIndex.xml page must contain the following block to be able to run the method in a test case.
<?xml version="1.0" encoding="utf-8"?>
<config xmlns:xsi="http://www.w3.org/2001/XMLSchema-instance" xsi:noNamespaceSchemaLocation="../../../../../../../vendor/magento/mtf/etc/pages.xsd">
    <page name="SynonymsIndex" area="Adminhtml" mca="search/synonyms/index" module="Magento_Search">
        <block name="pageActionsBlock" class="Magento\Backend\Test\Block\GridPageActions" locator=".page-main-actions" strategy="css selector"/>
    </page>
</config>
Now you can run generate.php as we did before to re-generate page classes.
How to code ‘Enter data according to a data set’
We need to enter data from a data set into the form fields.
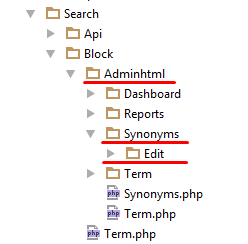
The Block directory in the Magento_Search module (in the Magento code) contains the Adminhtml/Synonyms/Edit directories, as shown below:
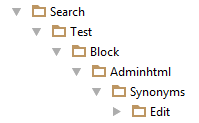
The Search/Test directory in functional tests should be constructed in a similar manner:
We need a fill() method from the \Magento\Mtf\Block\Form class and a mapping file.
Form mapping
We don’t need to define mapping parameters for the synonyms field, because they are the same as the default values. (See the nodes description table.) The same is applicable to the scope_id field except a type of input element, which is a custom typified element \Magento\Mtf\Client\Element\SelectstoreElement in our case. Let’s create the mapping file SynonymsForm.xml, which has the following code:
<mapping strict="0">
  <fields>
      <synonyms />
      <scope_id>
          <input>selectstore</input>
      </scope_id>
  </fields>
</mapping>
A block class must simply extend \Magento\Mtf\Block\Form class. Its name duplicates the name of the mapping file that is a concatenation of the fixture name and a Form ending (Synonyms+Form). Let’s create a \Magento\Search\Test\Block\Adminhtml\Synonyms\Edit\SynonymsForm empty class:
<?php

namespace Magento\Search\Test\Block\Adminhtml\Synonyms\Edit;

use Magento\Mtf\Block\Form;

/**
 * Synonyms edit form in admin.
 */
class SynonymsForm extends Form
{
    //
}
Now we have the following structure:
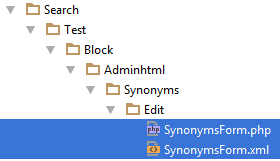
Then we should add the block class to the SynonymsNew.xml page object. To identify a form block on the HTML page, use an id='page:main-container' css selector.
<block name="synonymForm" class="Magento\Search\Test\Block\Adminhtml\Synonyms\Edit\SynonymsForm" locator="[id='page:main-container']" strategy="css selector" />How to code ‘Click the “Save Synonym Group” button’
The save() method from the \Magento\Backend\Test\Block\FormPageActions block class allows you to click the “Save Synonym Group” button.
The SynonymsNew.xml page must contain this class. The .page-main-actions css selector will help to identify a UI block with the button on the HTML page.
<block name="formPageActions" class="Magento\Backend\Test\Block\FormPageActions" locator=".page-main-actions" strategy="css selector" />Step 7. Add the blocks to pages
In previous step, we created blocks with methods that enable us to perform the required test flow.
To associate methods with pages, blocks must be added to pages.
Search Synonym page
A corresponding page object in a functional test is <magento2_root_dir>/dev/tests/functional/tests/app/Magento/Search/Test/Page/Adminhtml/SynonymsIndex.xml
The page with a block:
<?xml version="1.0" encoding="utf-8"?>
<config xmlns:xsi="http://www.w3.org/2001/XMLSchema-instance" xsi:noNamespaceSchemaLocation="../../../../../../../vendor/magento/mtf/etc/pages.xsd">
    <page name="SynonymsIndex" area="Adminhtml" mca="search/synonyms/index" module="Magento_Search">
        <block name="pageActionsBlock" class="Magento\Backend\Test\Block\GridPageActions" locator=".page-main-actions" strategy="css selector"/>
    </page>
</config>
New Synonym Group page
A corresponding page object in a functional test is <magento2_root_dir>/dev/tests/functional/tests/app/Magento/Search/Test/Page/Adminhtml/SynonymsNew.xml
The page with blocks:
<?xml version="1.0" encoding="utf-8"?>
<config xmlns:xsi="http://www.w3.org/2001/XMLSchema-instance" xsi:noNamespaceSchemaLocation="../../../../../../../vendor/magento/mtf/etc/pages.xsd">
    <page name="SynonymsNew" area="Adminhtml" mca="search/synonyms/new" module="Magento_Search">
        <block name="synonymForm" class="Magento\Search\Test\Block\Adminhtml\Synonyms\Edit\SynonymsForm" locator="[id='page:main-container']" strategy="css selector" />
        <block name="formPageActions" class="Magento\Backend\Test\Block\FormPageActions" locator=".page-main-actions" strategy="css selector" />
    </page>
</config>
To generate PHP classes for these pages, enter the following command from your terminal.
php <magento2_root_dir>/dev/tests/functional/utils/generate.php
Now we can define the test flow in a test() method of the test case (Step 3).
Step 8. Define the test() method
Here we should recall Step 3, where the initial test case was created.
An argument for the test() method is a test object (a fixture).
/**
 * Create Synonym group test.
 *
 * @param Synonym $synonym
 * @return void
 */
public function test(Synonym $synonym)
{
    // Steps
}
Now we can add page classes made in Step 5:
use Magento\Search\Test\Page\Adminhtml\SynonymsIndex;
use Magento\Search\Test\Page\Adminhtml\SynonymsNew;
All methods are defined in blocks (Step 6) that are grouped in pages (Step 5, Step 7).
Remember our test flow:
- Log in to Admin
- Open the Search Synonym page
- Click the “New Synonym Group” button
- Enter data according to a data set
- Click the “Save Synonym Group” button
Let’s code it!
Log in to Admin and open the Search Synonym page
In the FTF, the process of logging in doesn’t require a special method and is performed automatically when any page from the Admin is opened. A method, which we will use, is an open() method of the Magento/Mtf/Page/BackendPage class. There is no need to add this class in use, because it is inherited from the Magento/Search/Test/Page/Adminhtml/SynonymsIndex class.
$this->synonymsIndex->open();
Click the “New Synonym Group” button
To Click the “New Synonym Group” button, we will use the addNew() method from the pageActionsBlock block. A getPageActionsBlock() of the generated Magento/Search/Test/Page/Adminhtml/SynonymsIndex class receives parameters defined in the pageActionsBlock block (class, locator, strategy).
$this->synonymsIndex->getPageActionsBlock()->addNew();
This action opens the New Synonym Group page.
Enter data according to a data set
To enter data in the form, we use the fill() method from the synonymForm block of the synonymsNew page. An argument for this method is a fixture Synonym. A getSynonymForm() method of the generated Magento/Search/Test/Page/Adminhtml/SynonymsNew class receives parameters defined in the synonymForm block.
$this->synonymsNew->getSynonymForm()->fill($synonym);
Click the “Save Synonym Group” button
A save() method with parameters defined in a formPageActions block. Parameters are injected using a getFormPageActions() method from the synonymsNew page (generated Magento/Search/Test/Page/Adminhtml/SynonymsNew page class).
$this->synonymsNew->getFormPageActions()->save();
Full test() definition
/**
 * Create Synonym group test.
 *
 * @param Synonym $synonym
 * @return void
 */
public function test(Synonym $synonym)
{
    // Steps
    $this->synonymsIndex->open(); // logs in to Admin, opens Search Synonyms page
    $this->synonymsIndex->getPageActionsBlock()->addNew(); // receiving of the page action block with '_rootElement' containing locator which is indicated in the page class for PageActionBlock from the page, makes 'click' action on it
    $this->synonymsNew->getSynonymForm()->fill($synonym); // enters data from variation in the New Synonym Group fields
    $this->synonymsNew->getFormPageActions()->save(); // `click` on the Save Synonym Group button
}
Step 9. Check the test run
The test is now ready to run. It is complete, except for an assertion that we will create in the next step.
The full test case code:
<?php

namespace Magento\Search\Test\TestCase;

use Magento\Mtf\TestCase\Injectable;
use Magento\Search\Test\Fixture\Synonym;
use Magento\Search\Test\Page\Adminhtml\SynonymsIndex;
use Magento\Search\Test\Page\Adminhtml\SynonymsNew;

/**
 * Steps:
 * 1. Log in to Admin.
 * 2. Open the Search Synonym page.
 * 3. Click the "New Synonym Group" button.
 * 4. Enter data according to a data set. For each variation, the synonyms must have unique identifiers.
 * 5. Click the "Save Synonym Group" button.
 * 6. Verify the synonym group saved successfully
 */
class CreateSynonymEntityTest extends Injectable
{
    /**
     * Search Synonyms Index page.
     *
     * @var SynonymsIndex
     */
    private $synonymsIndex;

    /**
     * New Synonym Group page.
     *
     * @var SynonymsNew
     */
    private $synonymsNew;

    /**
     * Inject pages.
     *
     * @param SynonymsIndex $synonymsIndex
     * @param SynonymsNew $synonymsNew
     * @return void
     */
    public function __inject(
        SynonymsIndex $synonymsIndex,
        SynonymsNew $synonymsNew
    ) {
        $this->synonymsIndex = $synonymsIndex;
        $this->synonymsNew = $synonymsNew;
    }

    /**
     * Create Synonym group test.
     *
     * @param Synonym $synonym
     * @return void
     */
    public function test(Synonym $synonym)
    {
        // Steps
        $this->synonymsIndex->open();
        $this->synonymsIndex->getPageActionsBlock()->addNew();
        $this->synonymsNew->getSynonymForm()->fill($synonym);
        $this->synonymsNew->getFormPageActions()->save();
    }
}
You can run the test using your IDE or the CLI. The Selenium Server must be up and running. To run the test using the CLI, enter in your terminal:
cd <magento2_root_dir>/dev/tests/functional
vendor/bin/phpunit --filter CreateSynonymEntityTest
The test will be performed in a browser. Three synonyms groups are created one by-one that corresponds to three variations in a data set.
Step 10. Create the assertion
The last item in the test description says that the test must check that a success message is displayed after the test flow completes.
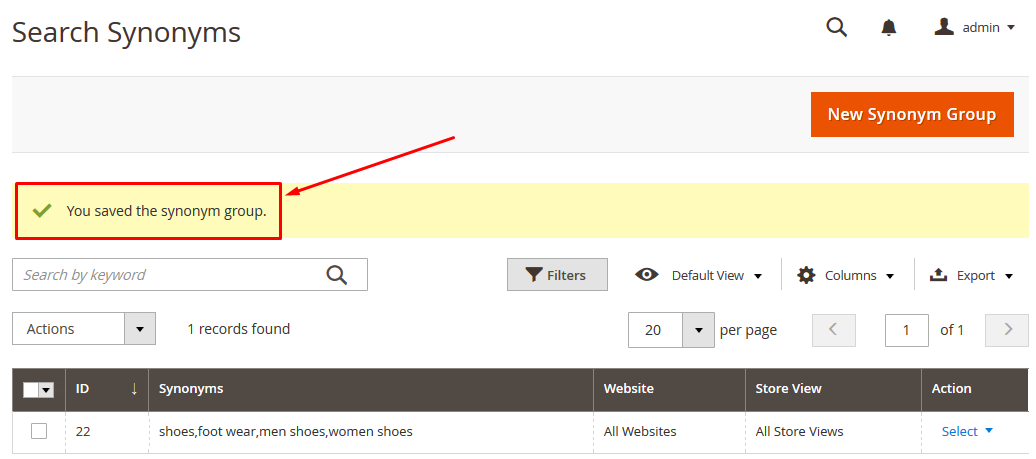
To cover this, we should create the test assertion (constraint) and add the full class name to a variation of the data set.
Fortunately, this type of assertion is commonly used in functional tests. If we search on the phrase “SuccessSaveMessage” in <magento2_root_dir>/dev/tests/functional, there will be several matches. Let’s select from the list of results a \Magento\Customer\Test\Constraint\AssertCustomerSuccessSaveMessage class. It has the following code:
<?php
/**
 * Copyright © 2015 Magento. All rights reserved.
 * See COPYING.txt for license details.
 */

namespace Magento\Customer\Test\Constraint;

use Magento\Customer\Test\Page\Adminhtml\CustomerIndex;
use Magento\Mtf\Constraint\AbstractConstraint;

/**
 * Assertion to check Customer success save message.
 */
class AssertCustomerSuccessSaveMessage extends AbstractConstraint
{
    const SUCCESS_MESSAGE = 'You saved the customer.';

    /**
     * Assert that success message is displayed after customer save.
     *
     * @param CustomerIndex $pageCustomerIndex
     * @return void
     */
    public function processAssert(CustomerIndex $pageCustomerIndex)
    {
        $actualMessage = $pageCustomerIndex->getMessagesBlock()->getSuccessMessage();
        \PHPUnit_Framework_Assert::assertEquals(
            self::SUCCESS_MESSAGE,
            $actualMessage,
            'Wrong success message is displayed.'
            . "\nExpected: " . self::SUCCESS_MESSAGE
            . "\nActual: " . $actualMessage
        );
    }

    /**
     * Text success save message is displayed.
     *
     * @return string
     */
    public function toString()
    {
        return 'Assert that success message is displayed.';
    }
}
By making a simple change, we can create a constraint class that is needed \Magento\Search\Test\Constraint\AssertSynonymSuccessSaveMessage
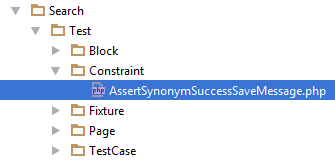
with the following code:
<?php

namespace Magento\Search\Test\Constraint;

use Magento\Search\Test\Page\Adminhtml\SynonymsIndex;
use Magento\Mtf\Constraint\AbstractConstraint;

/**
 * Assertion to check Success Save Message for Synonyms.
 */
class AssertSynonymSuccessSaveMessage extends AbstractConstraint
{
    const SUCCESS_MESSAGE = 'You saved the synonym group.';

    /**
     * Check Success Save Message for Synonyms.
     *
     * @param SynonymsIndex $synonymsIndex
     * @return void
     */
    public function processAssert(SynonymsIndex $synonymsIndex)
    {
        $actualMessage = $synonymsIndex->getMessagesBlock()->getSuccessMessage();
        \PHPUnit_Framework_Assert::assertEquals(
            self::SUCCESS_MESSAGE,
            $actualMessage,
            'Wrong success message is displayed.'
            . "\nExpected: " . self::SUCCESS_MESSAGE
            . "\nActual: " . $actualMessage
        );
    }

    /**
     * Text success save message is displayed
     *
     * @return string
     */
    public function toString()
    {
        return 'Assert that success message is displayed.';
    }
}
To handle the messages we use the \Magento\Backend\Test\Block\Messages class, by adding the messagesBlock block to the SynonymsIndex page. In <magento2_root_dir>/dev/tests/functional/tests/app/Magento/Customer/Test/Page/Adminhtml/CustomerGroupIndex.xml, we can see that the following block is used:
<block name="messagesBlock" class="Magento\Backend\Test\Block\Messages" locator="#messages .messages" strategy="css selector"/>This block must be added to SynonymsIndex class. To do this:
1) Open <magento2_root_dir>dev/tests/functional/tests/app/Magento/Search/Test/Page/Adminhtml/SynonymsIndex.xml.
2) Add the block node:
<block name="messagesBlock" class="Magento\Backend\Test\Block\Messages" locator="#messages .messages" strategy="css selector"/>3) Launch the generating tool to update the page class:
php <magento2_root_dir>/dev/tests/functional/utils/generate.php
And now we can add <constraint> to each variation of a data set <magento2_root_dir>/dev/tests/functional/tests/app/Magento/Search/Test/TestCase/CreateSynonymEntityTest.xml:
<?xml version="1.0" encoding="utf-8"?>
<config xmlns:xsi="http://www.w3.org/2001/XMLSchema-instance" xsi:noNamespaceSchemaLocation="../../../../../../vendor/magento/mtf/etc/variations.xsd">
    <testCase name="Magento\Search\Test\TestCase\CreateSynonymEntityTest" summary="Create Synonyms" ticketId="MAGETWO-23022016">
        <variation name="CreateCategoryEntityTestVariation1_all_websites_all_store_views" summary="Create synonym for all websites and all store views">
            <data name="synonym/data/synonyms" xsi:type="string">shoes %isolation%, foot wear %isolation%, men shoes %isolation%, women shoes %isolation%</data>
            <constraint name="Magento\Search\Test\Constraint\AssertSynonymSuccessSaveMessage" />
        </variation>
        <variation name="CreateCategoryEntityTestVariation2_main_website_all_store_views" summary="Create synonyms for main website and all store views">
            <data name="synonym/data/synonyms" xsi:type="string">shoes %isolation%, foot wear %isolation%, men shoes %isolation%, women shoes %isolation%</data>
            <data name="synonym/data/scope_id/dataset" xsi:type="string">all_store_views</data>
            <constraint name="Magento\Search\Test\Constraint\AssertSynonymSuccessSaveMessage" />
        </variation>
        <variation name="CreateCategoryEntityTestVariation3_main_website_default_store_view" summary="Create synonyms for main website and default store views">
            <data name="synonym/data/synonyms" xsi:type="string">shoes %isolation%, foot wear %isolation%, men shoes %isolation%, women shoes %isolation%</data>
            <data name="synonym/data/scope_id/dataset" xsi:type="string">default_store_view</data>
            <constraint name="Magento\Search\Test\Constraint\AssertSynonymSuccessSaveMessage" />
        </variation>
    </testCase>
</config>
The test is ready to run.
You can run the test using your IDE or the CLI. The Selenium Server must be up and running. To run the test using the CLI, enter in your terminal:
cd <magento2_root_dir>/dev/tests/functional
vendor/bin/phpunit --filter CreateSynonymEntityTest
The test now checks after each variation whether a success message is displayed.
That’s it!