SSH and sFTP
SSH, or Secure Shell, is a common protocol used to securely log into remote servers and systems. You will typically use SSH to access your environments directly to enter CLI commands for managing your branching, creating variables, and much more. We also support sFTP (Secure FTP) using your SSH public key.
To use SSH, you need to:
- Generate your SSH public and private keys
- Add your SSH public key to your remote server either through CLI commands or the Project Web Interface
- Use Magento Cloud CLI or Git commands to SSH to an environment
You create an SSH key pair including a public and private key:
- The public key is safe to provide for accessing a site, SSH, and sFTP.
- The private key should remain private on your workspace that you use for remote accessing environments. Never share your private key. Don’t add it to a ticket, copy it to a chat, or attach it to emails.
How SSH keys work
When you enter an SSH command to connect your client to the remote host, the host and your workspace begin tests back and forth to verify and allow access. These tests use the public and private keys you generated. Your entered command initiates SSH key authentication to request access to the server, indicating the public key to use. The server checks for authorized keys in its list for your public key. When found, it generates a message string and encrypts it with the public key the host has for you. Your system receives the message, decrypts it using your local private key, and merges the message with a session ID. Your system generates an MD5 of the message and session ID, sending it back to the host. If everything checks out, this passes the connection test and completes full SSH access to the host.
You must create an SSH key pair on every machine and workspace you and your team expect to work with and access Magento Commerce (Cloud) and GitHub branches. The SSH keys connect you to GitHub to manage branches and push code without having to constantly supply your username and password. You can add multiple SSH keys to GitHub per each workspace you use.
The SSH keys require the following:
- Set up SSH keys as the Magento file system owner.
- Create the keys using the email address used for the GitHub account.
For more information on SSH keys, see the following:
Locate an existing SSH key pair
An existing SSH key pair is typically located in the .ssh subdirectory of the user’s home directory. This folder is hidden and may not display in the file manager or finder unless configured to display hidden files and folders.
You can quickly verify if you have SSH keys by entering commands using terminal access.
To check for SSH keys, enter the following command:
ls ~/.ssh
If you have SSH keys, a directory listing is displayed similar to the following:
id_rsa id_rsa.pub known_hosts
If you don’t have SSH keys, you need to generate the keys for adding to your Magento ECE account and GitHub account. See Create a new SSH key pair.
If you already have SSH keys, continue to:
Create a new SSH key pair
Use the ssh-keygen command to create an SSH key pair. ssh-keygen is typically installed on Linux systems.
To create an SSH key pair:
-
The command syntax follows, entering the email used for your GitHub account:
ssh-keygen -t rsaGitHub also uses the key length
-b 4096in the command. Follow the prompts to complete the key. -
When prompted to “Enter a file in which to save the key,” press Enter to save the file to the default location. The prompt displays the location.
-
When prompted to enter a secure passphrase, enter a phrase to use like a password. Make note of this passphrase. You may be requested to enter it depending on tasks you complete using a terminal during development.
-
After creating the SSH key pair, start the ssh-agent:
For Mac or Linux:
 $ eval "$(ssh-agent -s)"  For Mac, you may also want to edit the  `~/.ssh/config` file to automatically load keys into the ssh-agent and store passphrases in your keychain.

 Host *
     AddKeysToAgent yes
     UseKeychain yes
     IdentityFile ~/.ssh/id_rsa
For Windows:
$ eval $(ssh-agent -s) -
Add the SSH key to the ssh-agent. If you used a different name for the key file name, replace
id_rsawith that file name.For Mac:
ssh-add -K ~/.ssh/id_rsaFor Windows or Linux:
ssh-add ~/.ssh/id_rsa -
Add your SSH key to your GitHub account. The instructions include Mac, Windows, and Linux.
Test the SSH keys
After adding the SSH keys, test the SSH connection to GitHub:
-
In the terminal, enter the following command:
ssh -T git@github.com -
You may see a warning that the authenticity of the host can’t be established followed by an RSA fingerprint. Enter
yesto continue. -
If successful, you should receive a success message. If you receive a permission denied error, see Error: Permission denied (publickey) troubleshooting on GitHub.
Add a public SSH key to your Magento account
You can add SSH keys to your account in any of the following ways:
- Using the Magento Commerce (Cloud) CLI
- Using the Magento Commerce (Cloud) Web Interface
Add a key using the CLI
To add an SSH key using the CLI:
- Open a terminal application on your local.
-
If you haven’t done so already, log in (or switch to) the Magento file system owner to the server on which your SSH keys are located.
-
Log in to your project:
magento-cloud login -
Add the key:
magento-cloud ssh-key:add ~/.ssh/id_rsa.pub
Add a key using the Project Web Interface
You will select and add your SSH public key to each environment in your account.
- Starter: Add to Master (Production) and any environments you create by branching from Master
- Pro: Add to Master Integration environment. After your Staging and Production environments are provisioned, you can add the SSH keys to those environments.
To add an SSH key using the Project Web Interface:
-
Copy your SSH public key to the clipboard.
If you don’t already have SSH keys on that machine, see GitHub documentation to create them.
- Login and access your project through the Project Web Interface.
-
In your selected branch, an icon displays if you do not have an SSH key added.
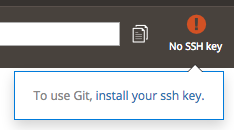
-
Copy and paste the content of your public SSH key in the screen.
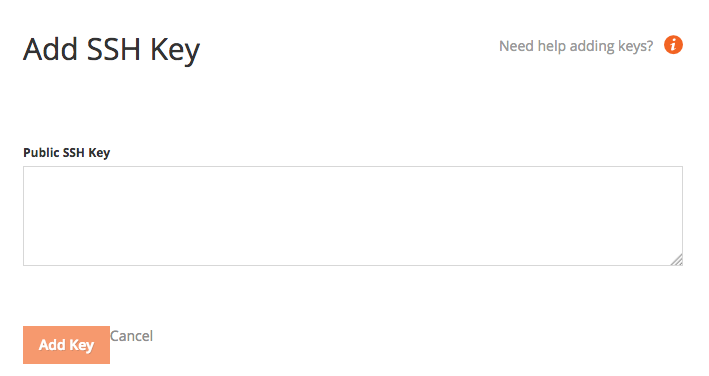
- Follow the prompts on your screen to complete the task.
Set global Git variables
Set required global Git variables on the machine to commit or push to a Git branch. These variables set Git credentials for accessing your GitHub account.
To set variables, enter the following commands on every workspace:
git config --global user.name "<your name>"
git config --global user.email <your e-mail address>
For more information, see First-Time Git Setup
SSH to an environment
You can connect using SSH in any of the following ways:
- SSH using Magento Cloud CLI
- Locate the SSH command in the Project Web Interface
- Git SSH commands for Pro Staging and Production
SSH using Magento Cloud CLI
Magento Cloud CLI commands can only be used in environments with the software installed. These environments include:
- Starter environments
- Pro Integration environments
To SSH to an environment using the Magento Cloud command line:
-
Log in to the project:
magento-cloud login -
List the project IDs:
magento-cloud project:list -
List the environments in that project:
magento-cloud environment:list -p <project ID> -
SSH to the environment:
magento-cloud ssh -p <project ID> -e <environment ID>
Locate the SSH command in the Project Web Interface
You can locate the SSH command for all Starter environments and Pro Integration environments through the Project Web Interface.
To copy the SSH command:
- Log in to the Project Web Interface.
- Select an environment or branch to access.
-
Click Access Site.
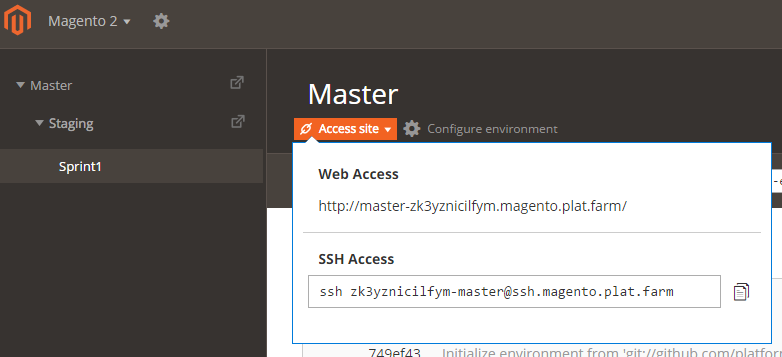
- Click the clipboard button to copy the full SSH command to the clipboard.
- Enter the command in a terminal window to SSH.
Example SSH command:
ssh abcdefg123abc-smith-a12b34c--mymagento@ssh.us-2.magento.cloud
Git SSH commands for Pro Staging and Production
You can’t use the Magento Cloud CLI to SSH into Pro plan Staging and Production systems. You can SSH into those environments and use Git CLI commands for managing your branches and Linux/Unix commands for managing the system.
With your SSH keys added to those servers, you can use a terminal application, the SSH command, and the URL to access the server.
For the URLs, see the following:
- Staging:
http[s]://staging.<your domain>.c.<project ID>.ent.magento.cloud -
Production:
- Load balancer URL:
http[s]://<your domain>.c.<project ID>.ent.magento.cloud - Direct access to one of the three redundant servers:
http[s]://<your domain>.{1|2|3}.<project ID>.ent.magento.cloud
- Load balancer URL:
SSH tunneling
You can also use SSH tunneling to connect to a service from your local development environment as if the service were local. Before tunneling, you need to have SSH configured.
Use a terminal application to log in and issue commands.
magento-cloud login
First, you may want to check if any tunnels are already open using the following command:
magento-cloud tunnel:list
To build a tunnel, you must know the name of the app to which to tunnel. Use the following commands to list those applications:
cd <project directory>
magento-cloud project:list
magento-cloud apps
For information on the command, you can enter magento-cloud apps --help.
Set up the SSH tunnel
Use the following command:
magento-cloud tunnel:open -e <environment ID> --app <app name>
For example, to open a tunnel to the sprint5 branch in a project with an app named mymagento, enter
magento-cloud tunnel:open -e sprint5 --app mymagento
Messages similar to the following display:
SSH tunnel opened on port 30003 to relationship: solr
SSH tunnel opened on port 30004 to relationship: redis
SSH tunnel opened on port 30005 to relationship: database
Logs are written to: /home/magento_user/.magento/tunnels.log

List tunnels with: magento-cloud tunnels
View tunnel details with: magento-cloud tunnel:info
Close tunnels with: magento-cloud tunnel:close
Get tunnel information
To display information about your tunnel, enter:
magento-cloud tunnel:info -e <environment ID>
Connect to services
Now you can connect to services as if they were running locally.
For example, to connect to the database, use the following command:
mysql --host=127.0.0.1 --user='<database user name>' --pass='<user password>' --database='<name>' --port='<port>'
Details about the service display if you use the magento-cloud tunnel:info command.
sFTP to environments
Typically, you want to use SSH for secure access to your environments and migrate files with rsync commands. We also support accessing your environments using sFTP (secure FTP) with SSH authentication.
You need the following requirements to sFTP into cloud environments:
- You need to use a client that supports SSH key authentication for sFTP and use your SSH public key.
- Your public SSH key must be added to the target environment. For Starter environments and Pro Integration environments, you can add it through the Project Web Interface. For Pro Staging and Production, you must enter a Support ticket with your public key attached. Never provide your private SSH key.
When configuring sFTP, use your SSH public key and the following information for access:
- Username: All content before the
@in your public SSH key. - Password: You do not need a password for sFTP. sFTP access uses the SSH key based authentication.
- Host: All content after the
@in your public SSH key. - Port: 22, which is the default SSH port.
To add your SSH public key information to your client:
- Use a text editor to open your generated SSH public key. Locate and edit the file in the directory location you generated it into.
- Copy and paste all content before the
@in the file for the client Username. - Leave Password empty.
- Copy and paste all content after the
@in the file for the client Host. - For the Port, enter 22.
Depending on the client, you may need to enter additional options and setup to complete SSH authentication for sFTP. Review the documentation for your selected client.
For Starter environments and Pro Integration environments, you may also want to consider adding a mount for access to a specific directory. You would add the mount to your .magento.app.yaml file. For a list of writable directories, see Project structure. This mount point will only work in those environments.
For Pro Staging and Production environments, you need to enter a Support ticket to request sFTP access in those environments. We can then create a mount point and provide access to the specific pub/media folder.